2025
Focus Note Wallpaper
Focus Note Wallpaper
I’ve been using Focus Note for a while now, and I love it. It’s a simple yet beautiful app that I use to take notes. It needs a companion. A simple and beautiful wallpaper that let’s you focus on your notes, so I created a simple one (actually two) with the color palette of the app.

Download:
My Decade-Long, Love-Hate Relationship with Note-Taking Apps. Until now.
My Decade-Long, Love-Hate Relationship with Note-Taking Apps
If you’re anything like me, your digital life is a graveyard of abandoned note-taking apps. For over a decade, I’ve been on a relentless quest for the perfect digital notebook, a journey that has left me with a mixture of appreciation and intense frustration.
Until now… that I have built my own.

Scratch your own itch
Scratching My Own Itch: Why I Built Focus Note
If you are one of those who spend lots of time in front of a computer and you write a lot of text, and I mean, A LOT, this might be familiar for you.
For years, my digital life has revolved around the idea of producing, storing and organizing content, specially text in the form of documents, notes, ideas, thoughts, presentations, manuals, instructions, etc. I’ve used a vast collection of applications and always ended up storing them all spread across a dozen different apps and formats. Each application promised a revolutionary way to organize my thinking, but each one ultimately fell short. Some were bloated with features I never used, turning the simple act of jotting down a thought into a complex task. Others were too rigid, forcing me into workflows that just didn’t feel natural. It always felt unnatural firing up Micrsofot Word for just jotting down a thought.
I’m a firm believer in the “scratch your own itch” philosophy. When you can’t find the tool you need, nowadays with the help of AI, you can build it. That’s what this story is all about. This is the story of a journey to build Focus Note.

Caballos vs Coches
De los caballos a los “caballos de potencia” pero sin caballos: No hay nada más que ver la transformación que se puede ver en dos fotos del mismo sitio con sólo 13 años de diferencia. En una simple imagen en la Quinta Avenida de Nueva York se observa el impacto de lo que supuso la aparición del coche en nuestra sociedad. Una foto que comparto para ilustrar el efecto de lo que nos viene encima. Por si alguien piensa que la IA no nos va a pasar por encima.

Sales vs Marketing
Sutilezas del Marketing que hacen que tu cerebro entiendas las cosas de otra manera, y lo predisponga para actuar de otra manera. Cuál es la diferencia ? Mucha …

Idiotex Extrema
Qué opinas del camino que parece que algunos están tomando ? algunas cosas me dejan desconsolado, cuando veo idiotez extrema, es una de ellas.

Cloud vs HomeAI
Qué opinas de la diferencia entre Cloud y HomeAI?

Cadena alimenticIA de NVIDIA
Ya veo donde estaré en la cadena alimenticia de NVIDIA, pero tendré un mini-Jarvis en casa.

Patiently wAIting

Patiently wAIting !!!
El lunes era el día en que NVIDIA celebraba su conferencia mundial GTC 2025, y si quieres ver todo lo que anunciaron de forma rápida te recomiendo este resumen: Nvidia’s GTC 2025 Keynote: Everything Announced in 16 Minutes.
El CEO de NVIDIA, Jensen Huang, dijo que “el 100% de los ingenieros de software en el futuro, y hay 30 millones de ellos en todo el mundo, estarán asistidos por IA. Estoy seguro de que el 100% de los ingenieros de software de NVIDIA estarán asistidos por IA para finales de este año. Y, por lo tanto, los agentes de IA estarán en todas partes”.
Intentando probar la v(ALÍA) de ALIA (Parte 2): Primer Análisis del LLM del Gobierno de España
Intentando probar la v(ALÍA) de ALIA (Parte 2)
El Gobierno de España, en colaboración con el Barcelona Supercomputing Center (BSC), ha lanzado ALIA, un modelo de lenguaje masivo (LLM) enfocado en el español y las lenguas cooficiales, que está disponible en Huggingface. Tras probarlo, aquí te cuento mis impresiones.
Hoy comparto un resumen de las pruebas realizadas con este modelo.
Intentando probar la v(ALÍA) de ALIA: Primeras pruebas con el LLM del Gobierno de España

Intentando probar la v(ALÍA) de ALIA
El Gobierno de España, en colaboración con el Barcelona Supercomputing Center (BSC), ha lanzado ALIA, un modelo de lenguaje masivo (LLM) enfocado en el español y las lenguas cooficiales, que está disponible en Huggingface. Tras probarlo, aquí te cuento mis impresiones.
Un paso adelante en la IA en español
Como alguien que ha trabajado en el pasado con el BSC en el proyecto TANGO: Transparent heterogeneous hardware Architecture deployment for eNergy Gain in Operation, puedo decir que siempre han estado a la vanguardia en tecnologías del lenguaje e inteligencia artificial. ALIA es un ejemplo más de su compromiso con el desarrollo de herramientas para nuestra lengua, financiado eso sí, por el Gobierno de España.
Pestañear ya no es un problema en Safari
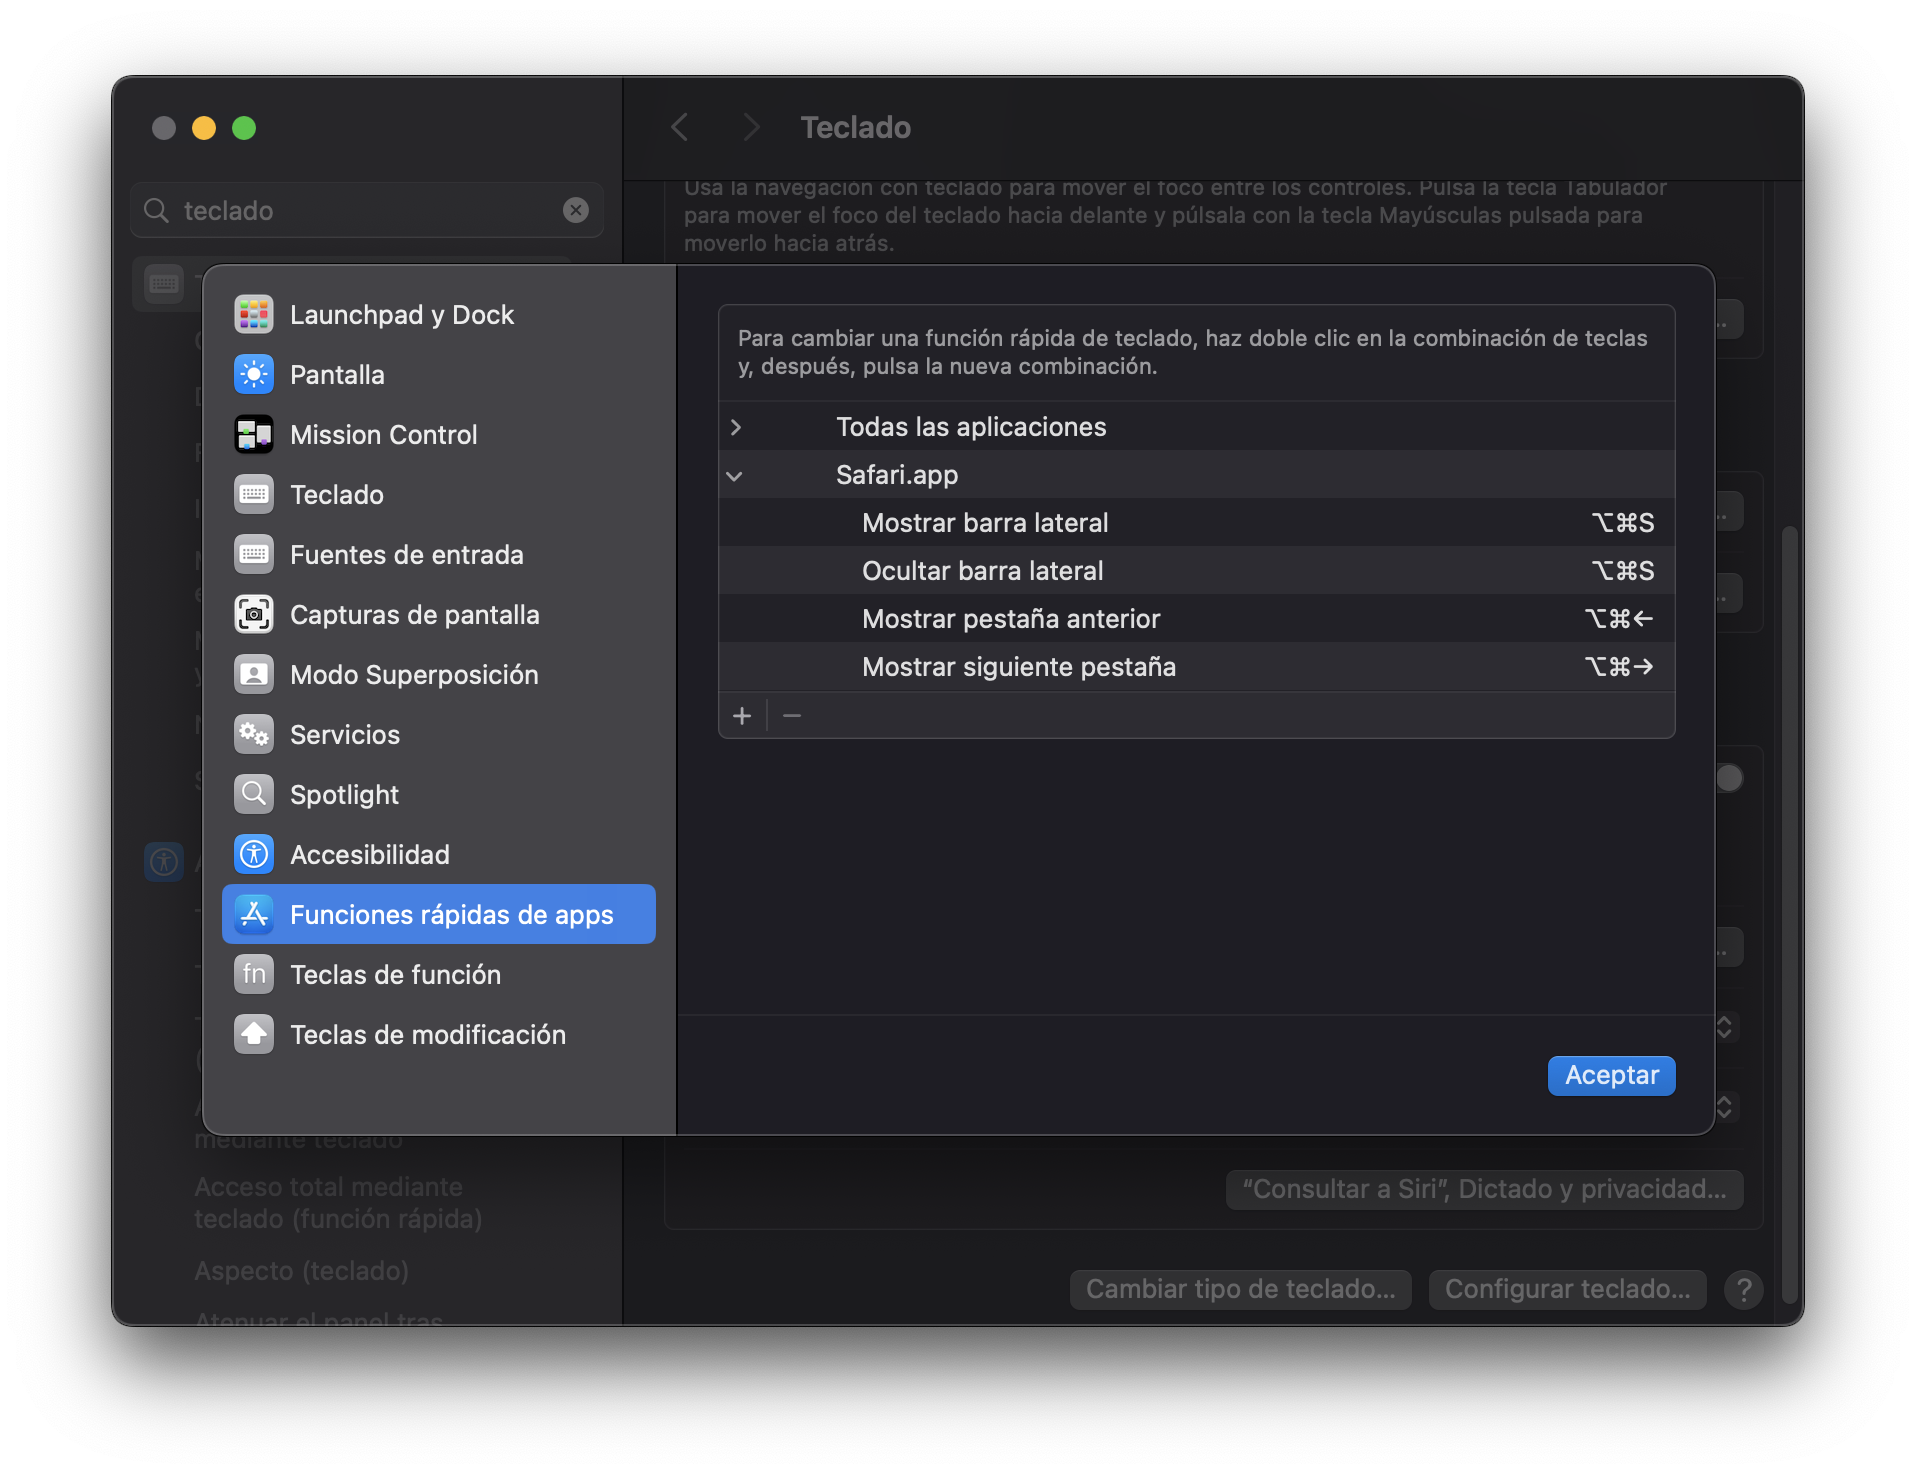
Pestañear ya no es un problema en Safari
Si alguna vez has intentado cambiar de pestaña en Safari con el teclado, sabrás que es una experiencia parecida a hacer yoga con los dedos. La combinación predeterminada es OPTION + CONTROL + TAB, lo cual no solo es difícil de recordar, sino que además requiere una flexibilidad digital que pocos tenemos.
Dotfiles Deja Vu

Cómo (volver a) automatizar la instalación de un mac nuevo con Dotfiles
Hace un año EXACTAMENTE que creé un post en el que automatizaba la instalación de aplicaciones. Hoy he tenido que hacerlo no porque haya instalado un nuevo mac, sino porque el antiguo se ha muerto tras actualizar el sistema operativo. Sí, es cierto, instalar paquetes de seguridad puede ser perjudicial para la salud de un equipo.
La suerte es que después del tiempo perdido recuperando el disco, sin éxito, y después reinstalando el OS completo, puedo decir que la instalación ha sido “coser y cantar”.
2024
Automatizar la instalación de un equipo nuevo con Dotfiles… sólo falta el equipo nuevo!!!

Automatiza todo lo que puedas
Inspirado en cómo monté hace 2 años el Macbook Pro M1 de empresa hace, hace un año configuré desde cero mi Macbook nuevo. Recientemente para darle un cambio de herramientas, hice una aproximación a dotfiles que luego modifiqué pero no había subido a Github.
Crear archivos markdown rápidamente con VS Code

VS Code como Markdown Editor
Ahora mismo, VS Code es el mejor editor de markdown (después de que Typora intentara cobrar por todo).
Sólo tienes que:
-
Instalar VS Code
-
Hacer que sea fácil abrir un archivo o directorio directamente en VS Code desde Finder. También puedes ser un ninja y saber que existe desde la terminal
code ., si no lo sabías, apréndetelo !!! Para ello, dejo la chuleta de cómo hacerlo con (con nuestro viejo y potente amigo)Apple Automatoren https://www.youtube.com/watch?v=dcjevVMhpoM:
…
Como activar Prettier en VS Code y no morir en el intento

Prettier: se me olvida ponerme guapo
Si sabes lo que es prettier, sabes que puede ser lo más útil para tener el código bien formateado, o lo que más te saque de tus casillas editando código. Si no sabes lo que es, te recomiendo usarlo https://prettier.io/docs/en/.
Ahora, el truco está en que cuando instalas el plugin de VS Code, no basta con instalarlo… hay que hacer lo siguiente RTFM, punto !!!
Recordatorio para mi mismo…
Ollama va a la universidad
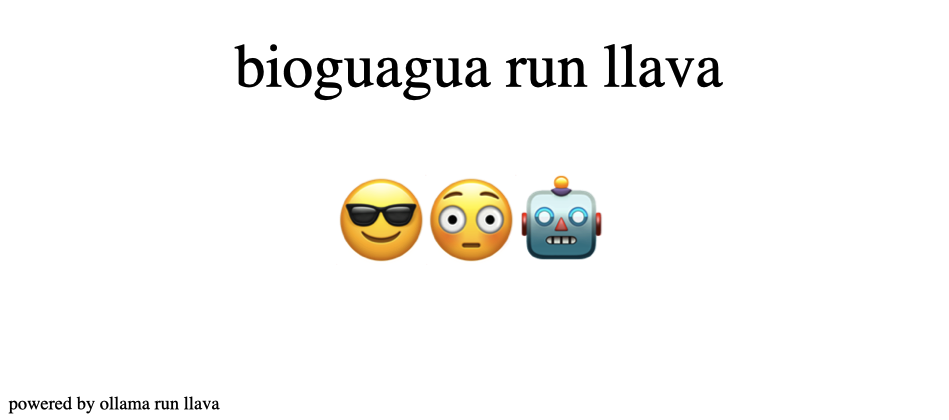
🦙 Ollama ya puede ejecutar modelos LLM multimodales
Ya está disponible la versión de llava en https://ollama.com/library/llava… y yo me he preguntado si con todo el revuelo que hay con la Generative AI estas últimas semanas, este modelo de andar por casa es capaz de dar el nivel.
Lo he enviado en la bioguagua a estudiar Bio-Medicina a la universidad y le he marcado algunas tareas, ejecutando una consulta multimodal sobre una imagen en disco con ollama run llava "what is in this image? /users/me/images/myimage.jpg"
Ollama, el Docker de los Modelos LLM (🦙❤️🐳)

🦙❤️🐳 Ollama, el Docker de los Modelos LLM
Si quieres trabajar con LLMs en local sin conexión de Internet, o no pasar por OpenAI ChatGPT lo sabe y lo usa todo, esta es la mejor solución.
Instalar Modelos LLMs en local con Ollama Server
1.Descarga desde Ollama.ai para tener servidor en local
Ahora ya puedes ejecutar modelos como Llama 2, Code Llama, y otros. También permite modificar y crear modelos personalizados como harías con una imagen de Docker.
Canario conoce tu Lengua

Random Canario 🇮🇨 - Canario conoce tu lengua (Parte 2)
Oopss !!! …parece que el día 3 ha llevado un año. Pero nunca es tarde si la dicha es buena.
Ya está disponible la aplicación básica de react y una nueva versión de la api con flask para darle servicio.
Puedes acceder al sitio web en randomcanario.oliverbarreto.com. La api, se encuentra también disponible en randomdic.oliverbarreto.com
2023
Canario conoce tu Lengua

Canario conoce tu lengua !!!
Recuerdas lo de “Canario conoce tu Tierra” ??? pues ya va siendo hora de que también te acostumbres a lo de “Canario conoce tu Lengua”. Por eso vamos a tratar de hacer fácil el poder acceder en distintos servicios online al diccionario de la lengua que se habla en esta tierra, o poder ofrecer una palabra “random” cada día, y otros casos de uso.
También me sirve para documentar el cómo llevar una idea a la realidad en menos de 3 días utilizando varias tecnologías.
Nunca dejes las cosas a simple vista… Vaultwarden
 No lo recuerdes todo … sólo todo lo que necesites recordar !!!
Almacenar cosas está bien… pero no las almacenes en texto plano… ponle puertas al campo y usa una contraseña para almacenar zips
2022
Don’t type again … move fast
A note to my future self…
 Get used to work with moving lines instead of copying and pasting lines again and again and again…
Instead of thinking in terms of copying a line of text, moving to the place you want to place it, and then (finally) paste it there… think in terms of just: move the line directly to the place you want it to be.
Deep dive… learning a new way to express myself
Deep Dive… learning a new way to express myself
 It might seem to be a litle bit too late, but… it’s never late to learn something new.
Simple steps to set up your new Macbook Pro M1 for developement and machine learning
Simple steps to set up your new Macbook Pro M1 for developement and machine learning
![]() Got your self a bran new powefull notched-version M1 Macbook Pro and you want to take advantage of its powerful chip as a developer ??? You have heard that is not that easy due to incompatibility issues, they are right, but there is a way to do it right. The following steps will be of your interest…
Got your self a bran new powefull notched-version M1 Macbook Pro and you want to take advantage of its powerful chip as a developer ??? You have heard that is not that easy due to incompatibility issues, they are right, but there is a way to do it right. The following steps will be of your interest…
Install TensorFlow on M1 Macs: Mission (It’s)possible
Install TensorFlow on M1 Macs: Mission (It’s)possible
 To install TensorFlow on a new Mac M1 is no simple task, unless you have priviledged access to the magic receipe.
Well, I just found a copy on the bright side of the Web that I want to share with you to make the installation a breeze.
Simple steps to set up a new Macbook Pro M1
Simple steps to set up a new Macbook Pro M1
 Got your self a bran new powerful ‘notched-version’ M1 Macbook Pro ??? You should set it up so you can brag about it.
ZSH Plugins that will make your life easier (if you remember)
ZSH Plugins that will make your life easier (if you remember)
Want to work faster with your finder and terminal folders, then remember this.
 Remember this terminal shortcuts to work faster with your finder and terminal folders.
Books you should read: The Power of Moments: Why Certain Experiences Have Extraordinary Impact by Cheap Heath
Finally taking the time to read this book that I bought last year !!!
Action nowadays is inaction
Action nowadays is inaction
 Are your actions driven by the algorithm??? Trapped in a world of social media and YouTube??? … where click-bait rules your time and your next action ???
A multiverse for text editors’ cursors
A note to my future self…
 Multiple cursor selection is way faster than “single-minded” cursors.
Multiple selections (multi-cursor) in VS Code
- Ctrl+F to find and select…
- … or Ctrl+D which selects the word at the cursor, and all other occurrences of the word where your cursors is right now.
- Tip: You can also add more cursors with Ctrl+Shift+L, which will add a selection at each occurrence of the current selected text. …
Why you need Obsidian to track tasks and knowledge by simply taking day-to-day notes
 Here is the story on how I use Obsidian as personal information system to track my daily notes, ToDos and even knowledge.
I used to take notes and track my todos in Apple’s reminders and notes apps. It didn’t work. I then tried to create markdown files and have them on my file system. It didn’t work since there was no way I could relate a file to a date on a calendar view. If you want to know how you can implement an effective and very productive workflow with Obsidian just continue reading.
Books you should read: Atomic Habits - James Clear
This is my new book !!! Books you should read: Atomic HAbits - James Clear
The terminal console I wish I had when I was a kid
In the previsous post I explained how to install all the apps that make my mac a great tool for productivity. Today, let’s focus on its configuration for development.
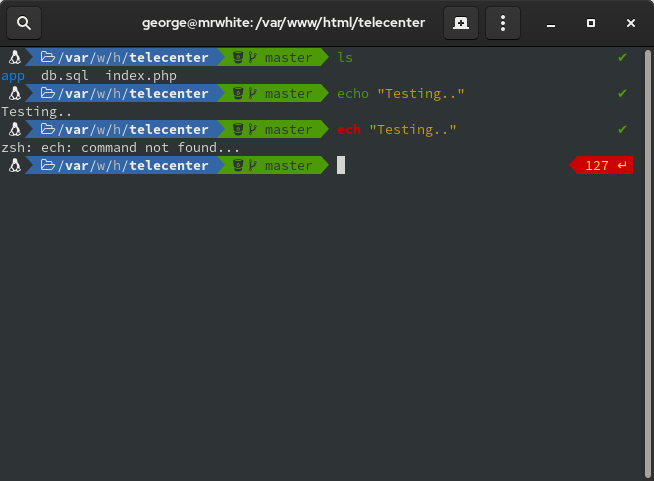
Today, I just got a new toy, so let’s make it act like it was the one I whish I had when I was a kid. A real hacking tool. To do so, I will configure a brand new and stilysh terminal, and the needed tooling for python and Swift development by installing tools like: Homebrew, Git, iTerm2, Oh My Zsh and Power Level 10K Themes, Visual Studio Code, Xcode, Python. Continue reading if you want to know more.
What’s on my mac? Apps to create a productivity weapon for work, and personal side-projects
 I just got a (not so) brand new Macbook Pro 16” 2019 i7, so it’s time to migrate from my old 2018 Macbook Pro 13”. Let’s setup this beast as a highly productive weapon for my development side-projects.
So without further due, let’s get this machine and tune it up to create a perfect productivity weapon for work and personal use. The secret sauce will be the pieces of software that run on it, and the configuration. In the next two articles I will post my personal preferences for both.
Do you itch yourself or scratch yourself?
 If you are reading this is becasse that catched your attention !!! Didn’t it ???
But make no mistake, this is an important thing to understand. Time and resources are limitted so you need to focus your attention.
When you are a dad, and the day has lots of other responsabilities other than spending time on that cool tech side project you have in mind. You need to be laser-focused on what you want to spend your time on. My case is that I’ve been sseeing lots and lots of people on youtube praising the Swift Combine framework that Apple introduced a couple of years ago. I’ve been holding on to jump right into it. But this time i had an itch to scratch where combine did come handy.
2021
Some lessons to learn from
From time to time (last time was on 2010 Some lessons to learn from…) it is good to remind myself these simple few lessons to learn from … just like a reset message that I need to get through all the noise out there to hit my brain and force it to think about … simple moves, simple math which can be applied in more complex problem solving… especially in personal matters !!!
Why you should buy a Raspberry Pi
Why you should buy a Raspberry Pi to make you love technology back again
Normal people don’t want to mess around with technology. You just want to buy things that “just work”. However, nowadays more or less everyone has some kind of piece of technology at home. Some have Sire, Alexa or Google smart speakers, assistants or even a security cam, or some smart lights or blinds. What would you say if having a few technical concepts in mind and armed with the intention to put technology at your service in several ordinary life areas. You only need two technologies to put up and running in just a few minutes cool projects: a Raspberry Pi and Docker.
Trying to create dynamics of a static site
After a few years sin 2013 that I created this webiste using Jekyll and So-Simple Theme by MadeMistakes I found that updating the theme was not going to be an easy task. Things have changed a lot since the good ‘ol-days’. We now have easier to deploy gem-based themes, don’t we ???
2013
Going Static makes me go more Dynamic
Web Design State of the Art
Modern web design and development change fast. Faster than fast. Quicker than quick. Faster than light. Latests trends include work being done revolving around responsive design amd you can read everywhere about it. However, I got tired of working with big CMS to hold webpages. They are just to big for my needs, they hold more features that I would ever need (just like MS Excel) and they come with one huge problem: Maintenance. Installing updates, upgrades and security patches or plugins can become a pain in the neck. Let’s not even talk about custom theme programming knowledge you need in order to create or cusomize your site design.
