In the previsous post I explained how to install all the apps that make my mac a great tool for productivity. Today, let’s focus on its configuration for development.

Today, I just got a new toy, so let’s make it act like it was the one I whish I had when I was a kid. A real hacking tool. To do so, I will configure a brand new and stilysh terminal, and the needed tooling for python and Swift development by installing tools like: Homebrew, Git, iTerm2, Oh My Zsh and Power Level 10K Themes, Visual Studio Code, Xcode, Python. Continue reading if you want to know more.
The tools:
- Homebrew (https://brew.sh/index_es)
- Git (using Homebrew)
- iTerm2 (https://iterm2.com or using Homebrew)
- Oh My Zsh (https://ohmyz.sh)
- Power Level 10K Themes (https://github.com/romkatv/powerlevel10k)
- Visual Studio Code (https://code.visualstudio.com/download)
- Python (https://www.python.org/downloads/ Python 3.7.9 is the latest binary version for 3.7 which is the one I use)
- Docker (https://docs.docker.com/desktop/mac/install/)
First of all credits and kudos to two inspirational videos where you can find two different ways of installing bash or continue with zs, which is the recently added shell for macOS since Catalina.
- Oh My Zsh version:
- https://www.youtube.com/watch?v=0MiGnwPdNGE&t=131s
- Resources: https://www.engineeringwithutsav.com/blog/spice-up-your-macos-terminal
- Oh My Bash version:
- https://www.youtube.com/watch?v=tMNOpaQrfAE
Let the configuration begin
Now, my toy, my tooling, my configuration !!!
- Instal Homebrew. I preffer doing so with a simple curl command.
/bin/bash -c "$(curl -fsSL https://raw.githubusercontent.com/Homebrew/install/HEAD/install.sh)" - Install iTerm2
brew install --cask iterm2 - Install Git to latest version (macOs comes with an old one)
brew install git
Don’t forget to later configure git with your github account and global configuration variables:
$ git config --global user.name "John Doe"
$ git config --global user.email johndoe@example.com
You will also need to update your local repos, with a new access token from Github.com Developer Settings page.
- Install Oh-My-Zsh and the fonts needed for a cool looking terminal
$ sh -c "$(curl -fsSL https://raw.github.com/ohmyzsh/ohmyzsh/master/tools/install.sh)"
#Download & Install the Fonts: `https://github.com/Falkor/dotfiles/blob/master/fonts/SourceCodePro%2BPowerline%2BAwesome%2BRegular.ttf`
- Install VSCode Download and install the app, or do it via homebrew:
brew install --cask visual-studio-code
Check if you can launch VSCode from the terminal with code .. If not, press CMD + SHIFT + P, type shell command and select Install code command in path.
Then update terminal.integrated.fontFamily setting to SourceCodePro+PowerLine+AwesomeRegular to use the new installed font for the terminal inside VSCode.
Getting your hands (really) dirty with pro-level customization
Back to iTerm2
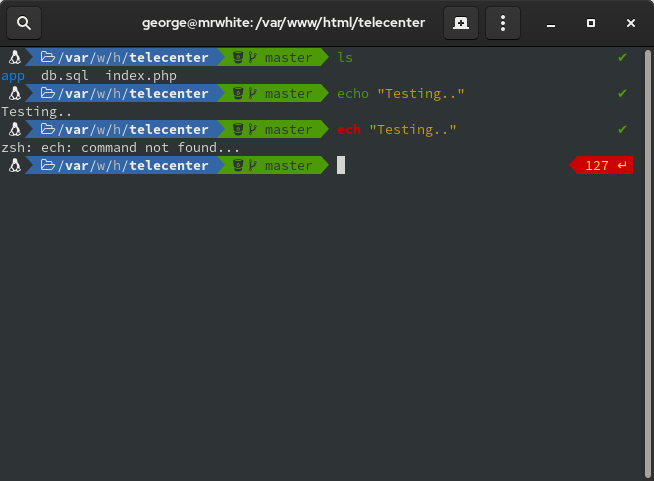
It is now time to really configure the terminal just how I would like it if I was a kid. that means different termianl tabs, cool meaningful colors, info… lots of usfeful pieces of information right on the window/tab such as git branch, time, name and complete folder paths, etc.
Go to iTerm preferences window by pressing CMD + ,:
Window tool bar
On Appearance/General set the position of a custom toolbar we are about to create. I like it at the bottom.
On Profiles/Session at the bottom, check the option for a custom “ status bar enabled”. Click configure, and then drag and drop what you like. In my case.
- CPU - RAM - Networking - A Custom Action element.
Configure the custom action to launch a new terminal tab with the same session and configure Auto-RAinbow Colors to, let’s say, light colors.
Window & Tabs Profiel Appearance
On Profiles/General set the option for the Working Directory for new tabs as Reuse previous session's directory.
On Profiles/Colors set your colors of choice. I like to leave pretty much everything as is, except that I like terminal text to be green. What can I do ? I guess I am an old-fashionned guy that still likes the matrix green rain code. So I just change Basic Colors: Foregroundas pure RGB Green (0, 255,0).
Use Natural Text Editing Style inside iTerm
This is a Pro one !!! This option will make your life easier. How many times have you been pressing the arrow keys just to go back in a long commit message since you cannot use keyboards shortcuts such as pressing ALT + ARROW KEY to jump words, and CMD + ARROW KEYS to jump whole paragraphs ? Well, enable this option which will enable the same behavior in terminal.
On Profiles/Keys/Key Mappings select from the selection combo below the key mappings grid, the one that says Natural Text Editing.
Set the font
On Profiles/Textset the font to SourceCode+PowerLine+AwesomeRegular.
On Profiles/Text increase the font size. I like it to be at least in 14 points.
Also, change the font on macOS Terminal app preferences to make it look back ok.
PowerLevel 10K Theme
Install PowerLevel 10K Theme on iTerm2
git clone https://github.com/romkatv/powerlevel10k.git
Set theme on .zshrc: by opening the configuration profile with your tool of choice, mine is VSCode. Replace the theme with:
code. ~/.zshrc
Then find and edit: ZSH_THEME="powerlevel10k/powerlevel10k"
Quit and re-launch iTerm to run the theme confitguration which prompts you a lot of customization choices. You can always restart from the beggining if you want to. If you fully screw up. Rerun the confitguration by reinstalling the them.
Oh-My-Zsh Plugins
Install all the plugins you want if needed, and then add the plugin to the Oh-My-Zsh configuration file (.zshrc) with code ~/.zshrc
You can install as many as you want:
plugins=(
	git
	zsh-autosuggestions
)
Enable autosuggestions
First instal it by
git clone https://github.com/zsh-users/zsh-autosuggestions ${ZSH_CUSTOM:-~/.oh-my-zsh/custom}/plugins/zsh-autosuggestions`
And then add the plugin to the Oh-My-Zsh configuration file (.zshrc) with code ~/.zshrc
Alias
Configure your alias
Open Oh-My-Zsh configuration file (.zshrc) with code ~/.zshrc and edit the alias at the end of the file.
In my case I have one for my iCloud drive and another one to quickly access and open Oh-My-Zsh configuration file with VSCode.
# Example aliases
# alias ohmyzsh="mate ~/.oh-my-zsh"
alias zshconfig="code ~/.zshrc"

alias cdicloud='cd /Users/oliver/Library/Mobile\ Documents/com~apple~CloudDocs/'
More Dev Tools
From here you can install more and more tools. In my case:
- Install Xcode from App Store, and when prompetd allow the installation of
Xcode Command Tools. -
Install Python (https://www.python.org/downloads/ Python 3.7.9 is the latest binary version for 3.7 which is the one I use)
- Install Docker (https://docs.docker.com/desktop/mac/install/)
- Install CyberDuck (https://cyberduck.io/download/)
- Install VirtualBox (https://www.virtualbox.org/wiki/Downloads)
-
Install SublimeText2 (https://www.sublimetext.com/2). Yes I preffer VSCode, but I have a crash for sublime text since it was the first really cool text editor that allowed multiple cursors, find and relplace with regtools superpowers, and it is always a great tool to change context for editing text. It is a must !!! The next thing is installing the alias to be accessed from the terminal. Read the docs here https://www.sublimetext.com/docs/command_line.html#mac.
TL;DR; To use subl, the Sublime Text bin folder needs to be added to the path. For a typical installation of Sublime Text, this will be located at /Applications/Sublime Text.app/Contents/SharedSupport/bin.
Since we are using macOS Zsh,the default starting with macOS 10.15, the following command will add the bin folder to the
PATHenvironment variable:echo 'export PATH="/Applications/Sublime Text.app/Contents/SharedSupport/bin:$PATH"' >> ~/.zprofileNow we can access Sublime from anywhere in the terminal by:
$ subl . - Install Insomnia REST API tester (https://insomnia.rest/download). Yeap !!! I use this one Instead of Postman.
- Install Proxyman (https://proxyman.io) as a Modern. Native. Web Debugging Proxy.
- Install Google Chrome (https://www.google.com/chrome/)
- Install SQL DB Managers
- SQLite DB Browser (https://sqlitebrowser.org/dl/)
- TablePlus (https://tableplus.com)
- Install Heroku CLI:
$ brew tap heroku/brew && brew install heroku
Conclusion
There are many ways tto improve this whole process. For example, there are ways to automate the installation of VSCode plugins using an script. Also, we can create a script for automating Homebrew commands as well. This is something that gets my atention and definetely will spend some time in the future.
Why are macs considered the best world-class hardware for developers ? Definetly you have great hardware that runs smoothly with great software, a cool UNIX based kernel and a terminal. Since macOS 10.15 we can have the colorful terminal I wish I had when I was a kid. Now, forget about the mac as a toy. It is time to create some things.
Side note: Python SSL Certificates
TL;DR;
After installing Python 3.7 you get an SSL Certificate error everytime you try to run any urlib dependent library with Python…
In a nutshell: Python 3.6 and 3.7 do not rely on macOS’ openSSL anymore. It comes with its own openSSL bundled and doesn’t have access on MacOS’ root certificates.
You have two options:
1. Run an install command shipped with Python 3.6
cd /Applications/Python\ 3.7/
./Install\ Certificates.command
This will run the next command:
pip install certifi
or 2. Install the certifi package with
pip install certifi
I chose the first option and works fine !!!

